Hugo-博客搭建

1、hugo 安装
1.1、windows
1.1.1、hugo
下载地址:https://github.com/gohugoio/hugo/releases
下载二进制文件(官方推荐下载扩展版),解压到一个目录,并配置 hugo 的环境变量。

注意:使用 hugo 一定要配置好 git 和 go 的环境
配置环境变量
- 右键此电脑,打开属性

- 在关于页面中往下拉,找到 高级系统设置 ,并打开。

- 打开环境变量

- 双击打开

- 点击新建,并把
hugo解压的目录添加进去

- 运行
hugo version,看是否配置成功

1.1.2、git
下载地址:https://git-scm.com/download/win
- 根据自己的操作系统下载对应的安装包

安装程序包,无脑安装点下一步就行
1.1.3、go
下载地址:https://go.dev/dl/
这个也是和 git 安装一样,无脑安装点下一步。
1.2、linux
我是使用的 Arch Linux 系统,可以直接使用 sudo pacman -S hugo 来下载。使用命令下载安装的就是扩展版的。
其他 linux 操作系统,可以使用和 windows 的安装方法一样。
配置环境变量
| |

注意: linux 下的 path 变量使用英文冒号
2、创建一个博客
2.1、创建网站
| |
2.2、安装主题
| |
2.3、添加一个博客文章
| |
注意:默认情况下,所有文章和页面均作为草稿创建。如果想要渲染这些页面,请从元数据中删除属性 draft: true, 设置属性 draft: false 或者在以下步骤中为 hugo 命令添加 -D 或 --buildDrafts 参数。
2.4、启动
| |
注意: 由于 ixIt 使用了 Hugo 中的 .Scratch 来实现一些特性, 非常建议你为 hugo server 命令添加 --disableFastRender 参数来实时预览你正在编辑的文章页面。
3、博客内容管理
参考文章:https://fixit.lruihao.cn/zh-cn/documentation/content-management/introduction/
注意 :
featured-image-preview: 表示首页文章的缩略图resources: 里面属性使用的是相对路径,优先级比较低
4、github action 自动化部署
官方地址方法:https://gohugo.io/hosting-and-deployment/hosting-on-github/
创建一个保存原文件的仓库和一个
用户名.github.io的仓库在源文件仓库中创建
.github/workflows目录,并在目录下创建hugo.yaml文件。内容如下1 2 3 4 5 6 7 8 9 10 11 12 13 14 15 16 17 18 19 20 21 22 23 24 25 26 27 28 29 30 31 32 33 34 35 36 37 38 39 40 41 42 43 44 45 46 47 48 49 50name: github pages # push 到 main 分支触发 on: push: branches: - main jobs: deploy: # 运行的环境 runs-on: ubuntu-latest env: HUGO_VERSION: 0.115.1 steps: # 安装 hugo 程序 - name: Install Hugo CLI run: | wget -O ${{ runner.temp }}/hugo.deb https://github.com/gohugoio/hugo/releases/download/v${HUGO_VERSION}/hugo_extended_${HUGO_VERSION}_linux-amd64.deb \ && sudo dpkg -i ${{ runner.temp }}/hugo.deb # 拉取源仓库代码 - name: Checkout uses: actions/checkout@v3 with: # 可选值 recursive 和 true submodules: recursive # 默认为 1。1:拉取最后一次提交,0:全部拉取 fetch-depth: 0 # 禁用中文转义 - name: Disable quotePath run: git config --global core.quotePath false # 构建 hugo 静态博客 - name: Build Hugo Static Blog env: HUGO_ENVIRONMENT: production HUGO_ENV: production run: hugo --gc --minify # 把 public 目录下的文件推送到 roukaixin.github.io 仓库 - name: Deploy Hugo uses: peaceiris/actions-gh-pages@v3 with: deploy_key: ${{ secrets.ACTIONS_DEPLOY_KEY }} external_repository: roukaixin/roukaixin.github.io publish_branch: main publish_dir: ./public commit_message: ${{ github.event.head_commit.message }}注意:
Disable quotePath这个过程不一定需要加上,如果你的博客文件名有中文时一定需要加入,所以一般加上比较保险创建一个 ssh 密钥。
ssh-keygen -t rsa -C 'a3427173515@163.com' -f ~/.ssh/hugo_id_rsa在
用户名.github.io仓库的设置的Deploy keys设置公钥。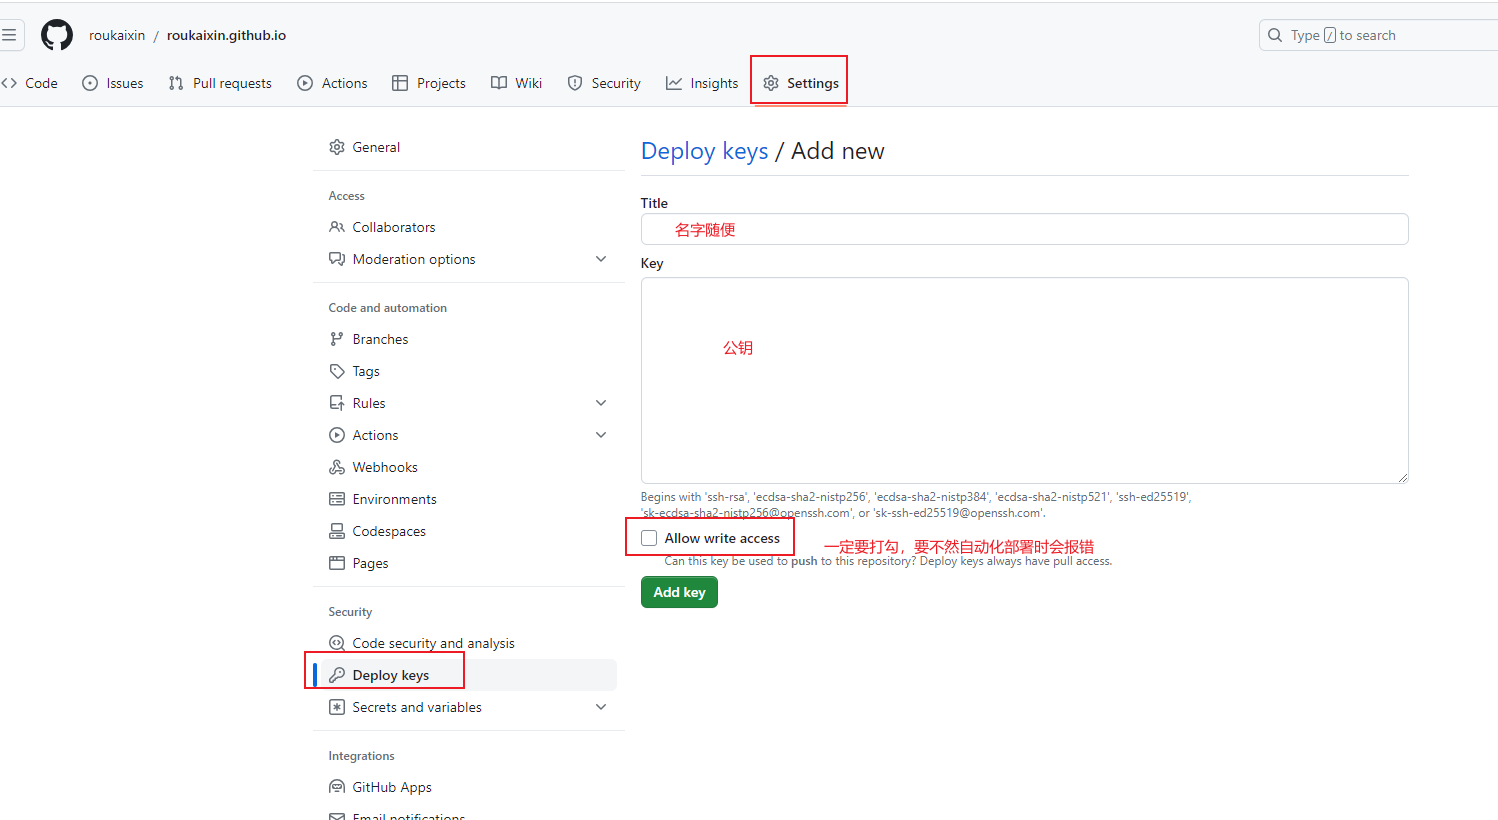
在源文件仓库的设置里的
secrets设置私钥。注意:私钥的名字一定要是ACTIONS_DEPLOY_KEY。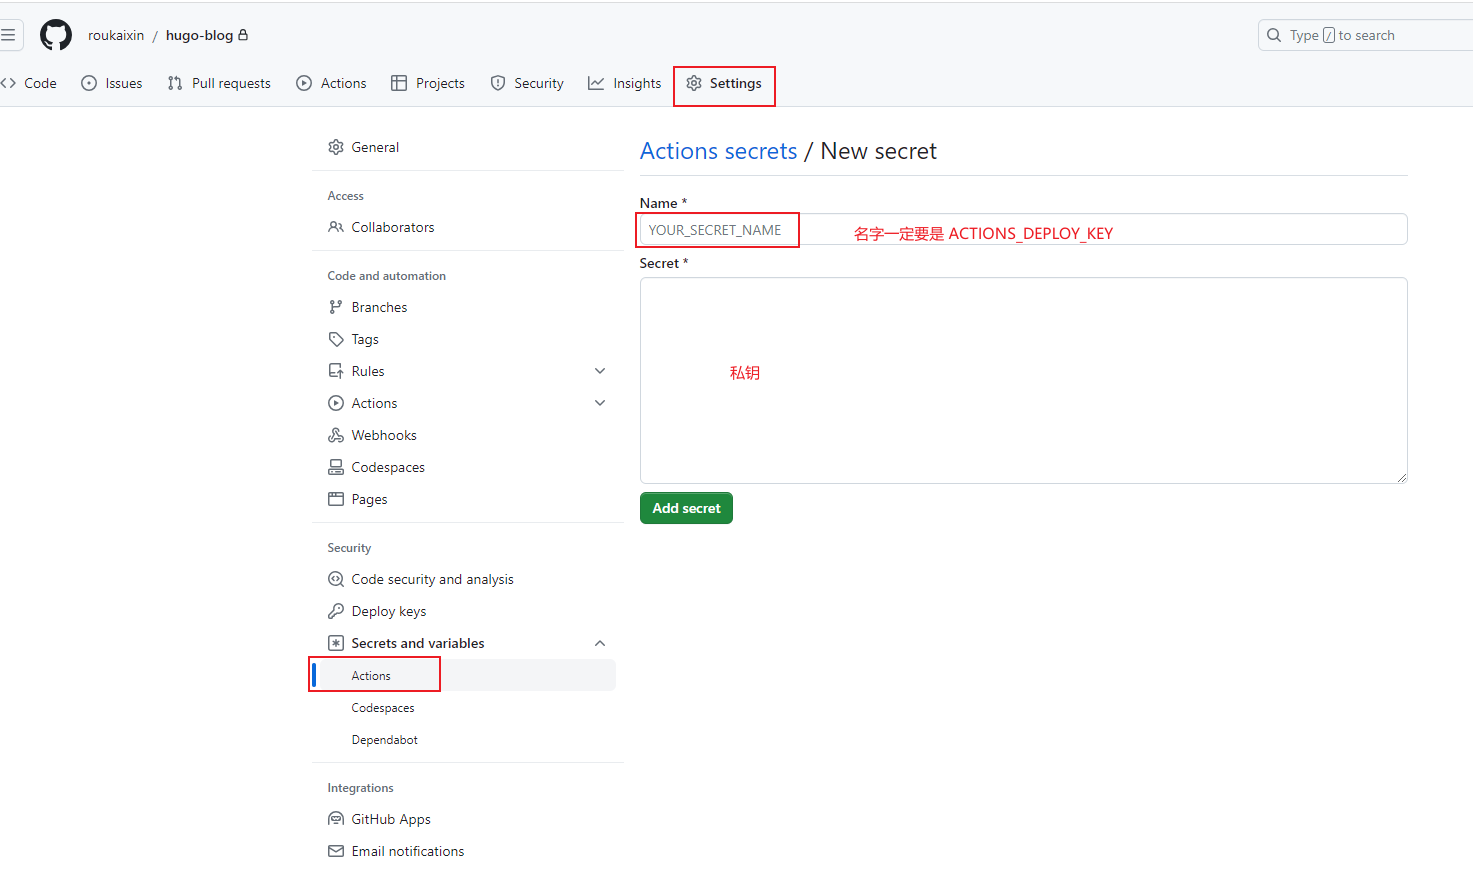


5、已 git 提交时间作为文章的更新时间
需要在 hugo 的配置文件中加入下面内容的配置
| |